| Adjusting Micrometers
Adjustments to micrometers are rarely needed, but in some cases
adjustments may be necessary. Before any adjustments are made to any
measuring instruments, you must first make sure that the instrument is
clean and in good condition. Also, in some manufacturing environments,
adjustments to measuring instruments can only be done by the inspection
department.
| Clean the micrometer by lightly closing a piece of paper between
the anvil and spindle surfaces of the micrometer. Slide the paper
out from between the surfaces and blow out any paper residue that
clings to the spindle or anvil (Figure 1). |
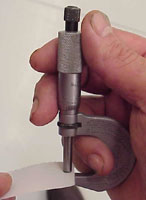
Figure 1 Cleaning the
measuring surfaces of the micrometer
|
|
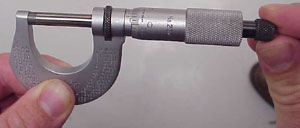
Figure 2 Use the same gaging force
when checking the micrometer as you would use when measuring a part.
|
Bring the spindle and anvil together using the ratchet or the
friction thimble (Figure 2). |
| Check the zero point on the barrel against the index line
located on the sleeve (Figure 3). |
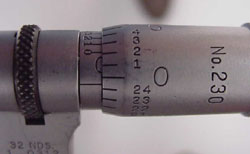
Figure 3 If the zero point and
the index line are not in alignment, an adjustment is necessary.
|

Figure 4 Adjustments to the micrometer are made with the
spindle and sleeve in contact with one another. |
If an adjustment is necessary, use the spanner
wrench, which was included with the micrometer, to turn the sleeve
until the line on the sleeve coincides with the zero line on the
thimble (Figure 4). |
| If any play has developed in the spindle screw threads due to
wear on the spindle, adjustments to the spindle nut may be necessary. To
adjust the spindle nut, back off the thimble until the spindle nut
is visible (Figure 5).
|
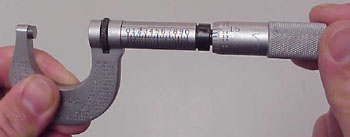
Figure 5 Back off the
thimble until the spindle nut is visible.
|
| Insert the spanner wrench in the slot of the adjusting nut and
tighten just enough to take out the play (Figure 6). |
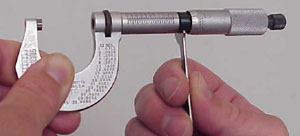
Figure 6 Use caution not to over-tighten the spindle
nut. |
|