Many parts in the machine shop will require the operator to turn a part with a taper and a tangent radius or fillet. With the advent of numerical control machines, the machinist will not be asked to perform radius turning as frequently as in the past, but certain situations will demand that the machinist be competent in this operation. Producing radii on parts can be done a number of different ways, but in this instance we will be discussing form turning tools.
Smaller radii can be produced easily through the use of a forming tool. Forming tools are cutting tool blanks with the required radius or form ground into them. Form grinding cutting tools take knowledge of cutting clearances and angles. If you need to refresh your memory on cutting tool relief and clearance angles, go to the cutting tool unit in this module.
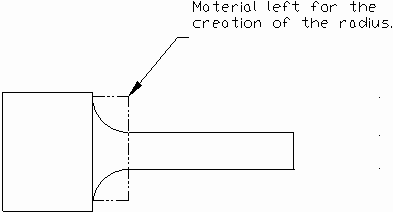
| When producing a radius on a part, it is necessary to leave enough material on the part to create the radius (Figure 10-1). |
|
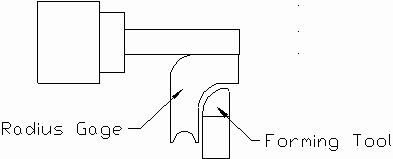
| The straight portion of the part will need to be rough turned. Keep in mind the location and size of the radius by laying out the part. Once the initial diameter of the part is turned to within 0.015 inch, you will rough in the radius. To produce a good finish on the radius, the part should revolve slowly. The RPM should be about 1/2 to 1/3 that of the rough turning speed. Set up the radius tool making sure that it is square with the work (see Figure 10-2). |
|
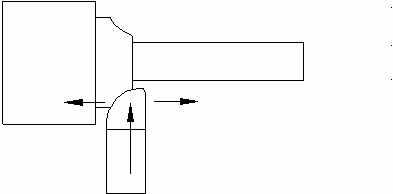
| The radius tool should be fed into the work slowly while plenty of cutting fluid is being applied. To avoid chatter, plunge the tool slowly into the workpiece using a slight longitudinal back and forth motion (Figure 10-3). |
|
| Once the radius is roughed in, take the finishing cut on the part. When the tool gets
to the radiused corner, allow it to finish the fillet, but don’t let the tool dwell
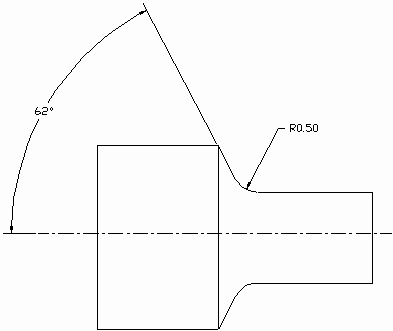
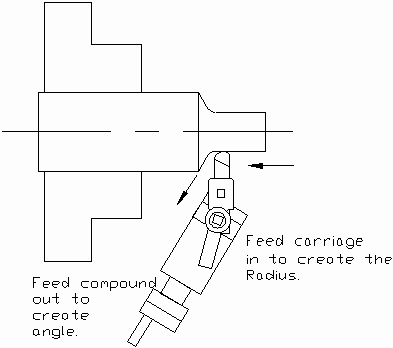
in one spot. Retract the tool as soon as possible. When you are creating a combination transition radius to a tangent angle (Figure 10-4), you must first adjust your compound rest to the proper angle. |
|
| Rough in the radius by moving the tool to the shoulder and turning the compound rest out (Figure 10-5). |
|
When you have the area roughed to within 0.015 on the diameter and length, take the finishing cut on the part. When the radius tool gets to the corner, allow it to finish the fillet, but don’t let the tool dwell in one spot. Retract the angled compound rest in a smooth, steady motion.
