Steel Rule Measurement With the technical advances being made, most people are inclined to think that complex electrical measuring equipment is needed to inspect parts made by the machinist or toolmaker. Although this is true in some cases, the majority of the parts that are made do not require this sophisticated equipment.
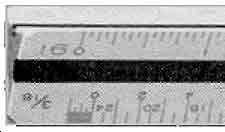
The rigid six-inch rule is a common measuring tool found in the machine shop. The rule is a strip of metal graduated in inches and fractions of an inch to give actual measurements. When tolerances of fractional dimensions are required, the steel rule is used. The most commonly used steel rule is the 6" rule. Although rules come in 6-inch increments (Example: 6", 12", 18", 24", and 36" lengths), the 6-inch rule is the most popular because it fits into the apron pocket easily. It also comes in various widths and thicknesses to meet varying requirements, as will be seen in the slide series. Rules vs. Scales
The terms "rules" and "scales" are used in different ways by different workers, sometimes causing confusion. While some manufacturing workers do not differentiate between these terms, others use the term "rule" when referring to a measurement tool that provides actual linear measurements. In other words one inch on the rule represents exactly one inch of linear distance. On the other hand, to these workers, a scale is a measurement tool in which an actual measured linear distance
Increment Divisions
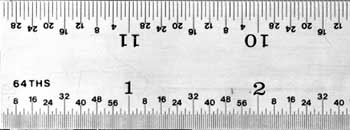
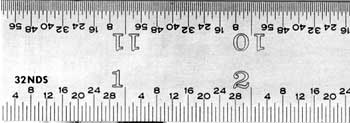
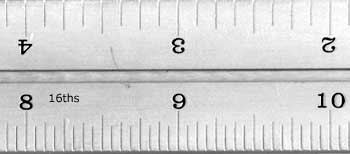
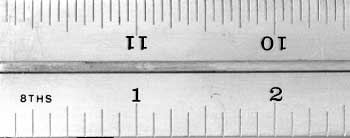
There are four basic divisions that are found on a fractional inch rule. These are: 1/64, 1/32, 1/16 and 1/8 of an inch.
These are the smallest graduations on the rule, therefore making the accuracy of a steel rule 1/64". This is sometimes argued by some of the metal workers who say they can measure to within ±.003 with the rule. They are right for they have worked with it a long time and have become masters at reading the graduations. However, the rule is only intended to measure to 1/64" accuracy, and other instruments are used to measure to closer tolerances.
As can be seen on the chart, 3/8" is only given as 3/8". It is not 24/64", 6/16", or 12/32". Any of these fractions does equal 3/8", but it is reduced to its lowest terms. Another example would be 7/16". This could be given as 14/32" or 28/64", but these are not in their lowest terms. Also, the 1/2 division, the 3/4 division and 1-inch division are not read as 8ths, 64ths, 32nds, or 1/16, even though they are made from these combinations. They are read as 1/2", 3/4", or 1 inch. Now that you have this information under your belt, let's look at how a rule should be used.
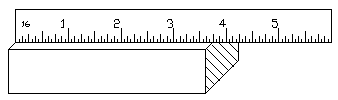
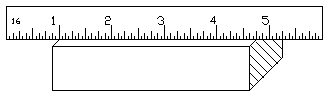
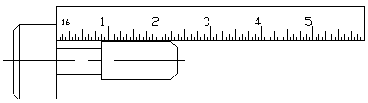
When measuring a length, the rule must be kept in a straight line
parallel to the centerline of the work. If it is tilted, the measurement
will be longer than the actual part. See Figure 10.
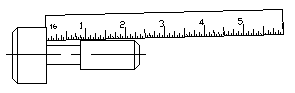
One other important factor in using the rule is to be aware of parallax. This is an observation error from the person measuring or holding at the part in relation to the part being held.
In Figure 11, the drawing on the left shows an incorrect way of measuring, and parallax is greatly increased because of the thickness of the rule. The graduations do not come in direct contact with the work. The arrows pointing to the right and left will cause parallax, and even though the arrow pointing straight up is the correct way to view the rule, there is a chance for error in reading due to the thickness of the rule. The drawing on the right shows the rule on its edge. As can be seen,
the graduation comes in contact with the work, which is the correct way of
measuring. Although the arrows pointing to the right and left will cause
an improper reading, it will not be as great an error as when the rule is used
in the manner shown in the drawing on the left. The proper way is to view the graduation straight
up as the center arrow illustrates.
|